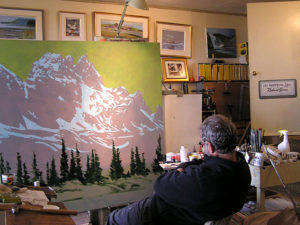
(1) Working on a pinkish ground I’m putting in a pattern of snow. I’ve painted the Ramparts in the Tonquin Range (near Jasper, Alberta) several times so I know pretty well what they look like. Accuracy is not too important.

(2) Here I’m laying on a transparent glaze of Phthalo blue which will have the effect of neutralizing the pink priming and also make the shadow areas for the snow. After the roller lays on the glaze it is smoothed out with a clean rag.

(3) Here I’ve worked up a foreground and I’m thinking what to do next. There are so many things to get on with at this stage that it’s easy to get ahead of yourself and not proceed in an optimum and efficient order.

(4) So I’ve got a start on the light and shade area of the snow. I’m sacrificing a bit of form in favor of developing a pattern. Yet I want the light and shadow to be truthful and to make a focus for the work.

(5) With night coming on I switch to the window. This permits more standing back and easier raising and lowering. I’ve started to establish the bluish character of the mountain and repainted the sky with some suggested activity.

(6) I’ve actually spent quite a bit of time with this foreground, more or less building the forms and working out the patterns. As a general rule I find it useful to work out the foreground fairly carefully.

(7) Back on the easel in the morning I’m scumbling white and orange over the top of other mountain colours. This has the effect of integrating the colours. I’ve further laid in an effect in the sky but I know this will be trouble.

(8) Some colours are premixed in yogurt cups. That way you can go here and there, stop and go on with something else, and then come back in the full knowledge that colours will match. Acrylic is perfect for this.

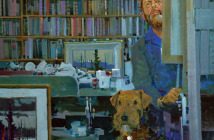
(9) Here I’m toning down a jumpy foreground with a glaze of blue and black. That’s Dorothy. She’s Sara’s Airedale who has been my support since Emily passed away. It’s early morning and it’s still dark out.

(10) The painting is a bit amorphous and wandering so I’m using a straightedge to find lineups that will strengthen the composition. I’m picking out major design features and picking them up in other places.

(11) The lake that peeks through here and there is actually a device that attempts to give my somewhat linear composition a bit of depth. Here, I’m overtopping the turquoise to more truly reflect the condition in the sky.

(12) Yep, that’s masking tape. I’m using it as a guide to put a little zip and gradation in the water. The space between the tapes will be painted in. The result will be a bit too hard-edged.

(13) Ramparts, Acrylic on Canvas, 60 x 60 inches. A layered buildup of elements and textures, it’s really an exercise in trying to defeat the squareness of the format. Right or wrong, rhythms and patterns have, by and large, taken precedence over form.


14 Comments
Wonderful painting and great to see the process. Thanks for this!
Thanks for sharing the process with the photos. It is a fantastic painting. Urania
This is very nice. Good painting, interesting painter and process. Thanks.
Just the impetus I needed to get started on a landscape. Beautiful. Thanks!
Excellent teacher! Will revisit this one often. Beautiful to follow step by step the intricacies of accomplishing his magic. Thanks. Blessings.
Wow. Very helpful set of photos to see the process of such a large painting. Thanks Sara! and of course Robert….
For most students and non painters it’s next to impossible to see the origins of a painting and its development by just seeing the final result
So thanks for sharing the evolution of your painting and your comments
It’s beneficial, and inspiring, to see the process. Thank you for sharing your dad’s methods. I’m off to start another painting. Needed that to motivate me today.
I finally get what is meant by rhythm in a composition! It comes out loud and clear!
Nice to see these memories as well as the work itself develop into a strong statement showing the powerful landscape of the north american northwest landscape.
Quite something for tropical flatlanders of the coast like myself. Thank you.
AND WHAT A WONDERFULLY MESSY STUDIO SURROUNDING AN ORGANIZED AND BEAUTIFUL LARGE CANVAS BEING PAINTED SO CAREFULLY BY YOUR DAD….WHAT A MENTOR FOR YOU, SARA……
Thank you for posting these progress photos! Super fun. The trick with the straight edge to line up focal points, I will remember that. :)
Thank you for sharing the process and reflections on the task. I especially appreciated the time out for thought (#3).
Thanks very much Sara. There is so much to be learned here. It would have been great to work with your father. I never knew he did such large work.